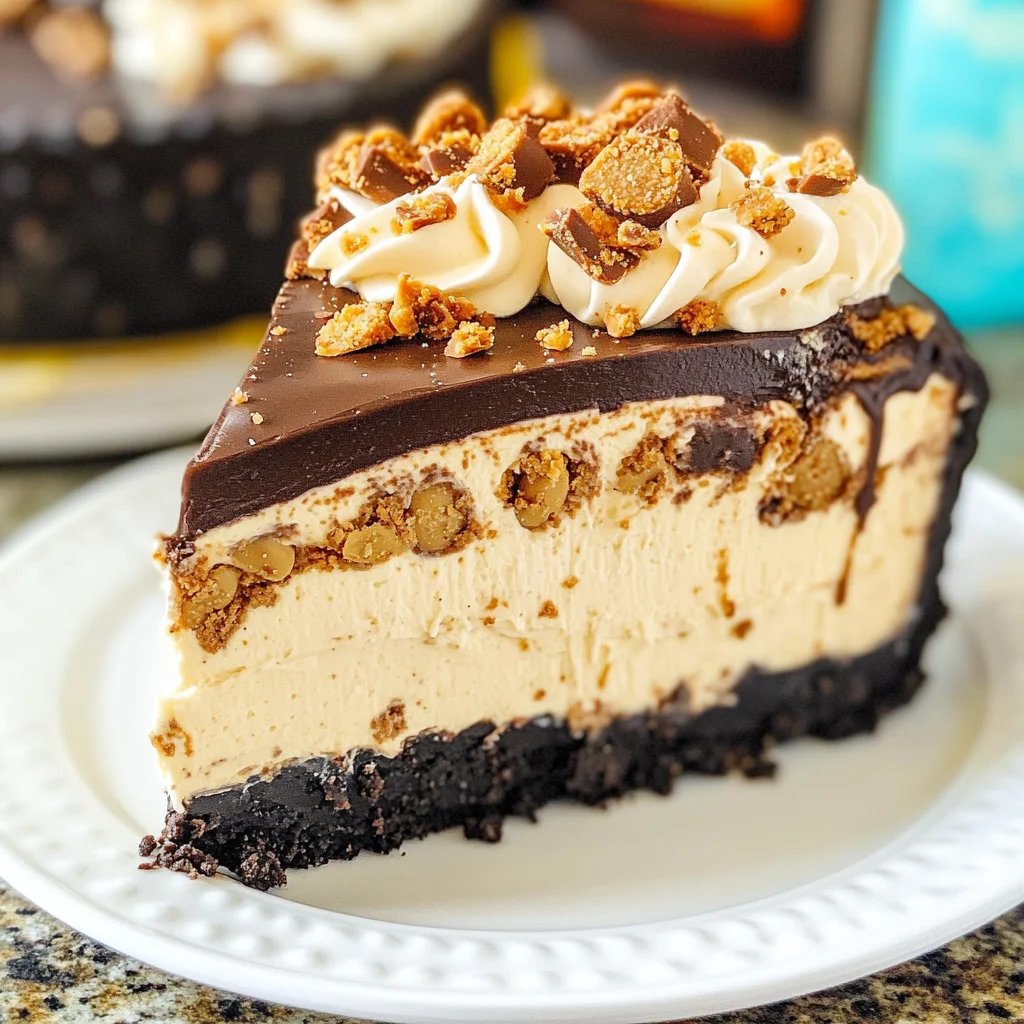
Butterfinger Cheesecake
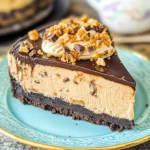
This Butterfinger Cheesecake is a dessert lover’s dream come true! With its rich and creamy peanut butter filling, crunchy Butterfinger pieces, and a decadent chocolate Oreo crust, it’s perfect for any occasion. Whether you’re celebrating a birthday, hosting a gathering, or just treating yourself, this cheesecake stands out with its delightful flavors and textures.
Why You’ll Love This Recipe
- Irresistible Flavor: The combination of peanut butter and Butterfinger creates a deliciously sweet and salty experience.
- Decadent Texture: Enjoy the creaminess of the cheesecake paired with the crunch from the Oreo crust and Butterfingers.
- Versatile Dessert: Perfect for celebrations or casual gatherings; everyone will love this showstopper.
- Easy to Make: With simple steps and common ingredients, you’ll impress your guests without breaking a sweat.
Tools and Preparation
Before diving into making this delicious Butterfinger Cheesecake, gather your tools to ensure a smooth baking process.
Essential Tools and Equipment
- Springform pan
- Mixing bowls
- Electric mixer
- Rubber spatula
- Measuring cups and spoons
Importance of Each Tool
- Springform pan: This allows for easy removal of the cheesecake without damaging its delicate structure.
- Electric mixer: It saves time and helps achieve a smooth batter by thoroughly mixing ingredients effortlessly.
Ingredients
For the Crust
- 2 1/4 cups (302g) Oreo crumbs
- 4 tbsp (56g) salted butter, melted
For the Cheesecake Filling
- 24 ounces (678g) cream cheese, room temperature
- 1 cup (207g) sugar
- 3 tbsp (24g) all purpose flour
- 3/4 cup (173g) sour cream, room temperature
- 1/2 cup (140g) peanut butter
- 1 tsp vanilla extract
- 4 large eggs, room temperature
- 1 1/2 cups (12 fun sized bars) chopped Butterfingers
For the Topping
- 6 oz semi-sweet chocolate chips
- 1/2 cup heavy whipping cream
- 3/4 cup heavy whipping cream
- 1/2 cup (58g) powdered sugar
- 2 tbsp (35g) peanut butter
- 1/4 tsp vanilla extract
- Chopped Butterfingers
Now that you have all your ingredients ready, let’s move on to making this irresistible Butterfinger Cheesecake!
How to Make Butterfinger Cheesecake
Step 1: Prepare the Crust
- Preheat your oven to 350°F (175°C).
- In a medium bowl, combine the Oreo crumbs and melted butter. Mix until well combined.
- Press the mixture firmly into the bottom of a springform pan to form an even layer. Bake for 10 minutes. Remove from oven and let cool.
Step 2: Make the Filling
- In a large mixing bowl, beat together the cream cheese, sugar, and flour. Mix until smooth.
- Add in the sour cream, peanut butter, and vanilla extract. Beat until well combined.
- Add in one egg at a time, mixing well after each addition. Gently fold in the chopped Butterfingers.
Step 3: Bake the Cheesecake
- Pour the filling over the cooled crust in the springform pan.
- Bake for approximately 50-60 minutes or until set but slightly jiggly in the center. Turn off the oven and let it cool in there for an hour.
Step 4: Prepare Toppings
- In a small saucepan over low heat, melt the chocolate chips with 1/2 cup of heavy whipping cream until smooth. Let cool slightly.
- In another bowl, whip together remaining heavy whipping cream with powdered sugar, remaining peanut butter, and vanilla extract until soft peaks form.
Step 5: Assemble
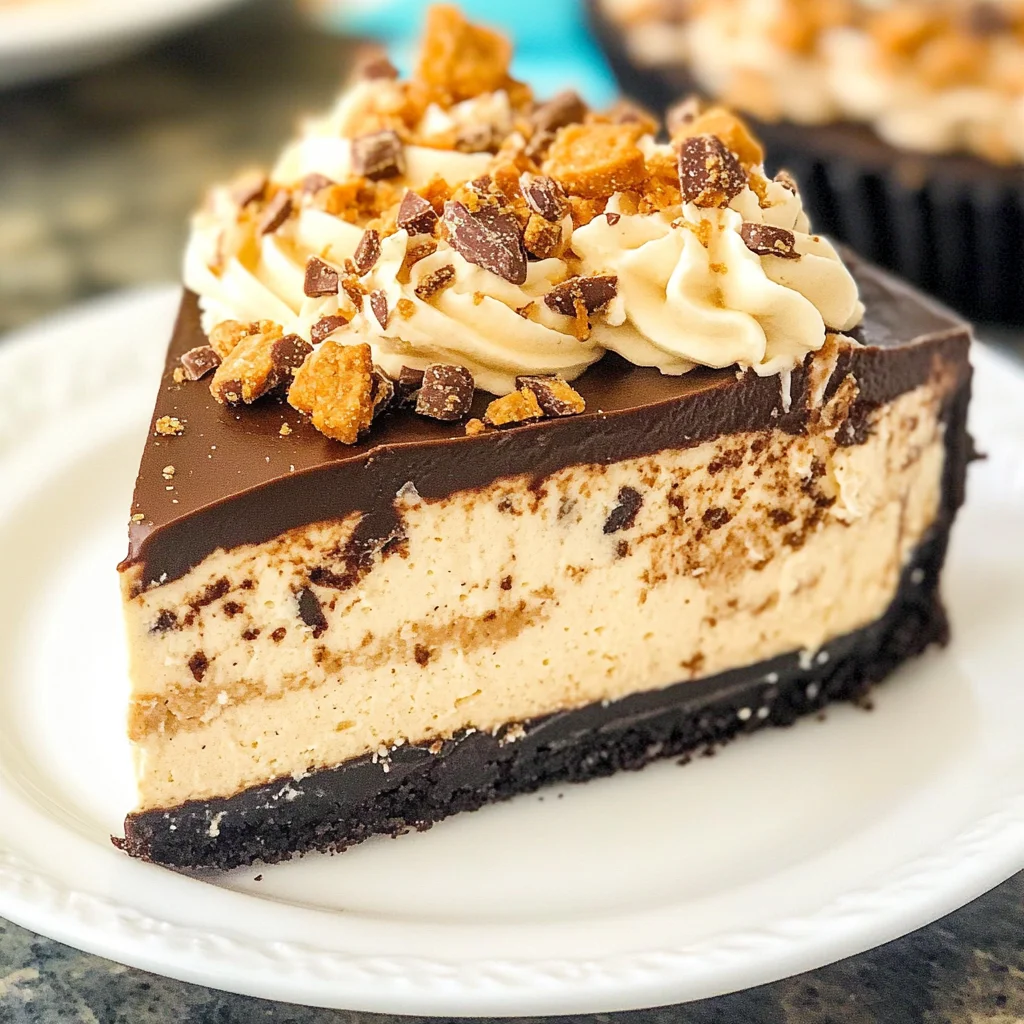
- Once cooled completely, pour chocolate ganache over cheesecake. Top with whipped cream mixture and sprinkle additional chopped Butterfingers on top.
Now your mouthwatering Butterfinger Cheesecake is ready to be served! Enjoy every delicious bite!
How to Serve Butterfinger Cheesecake
This Butterfinger Cheesecake is a delightful dessert that can be served in various ways. Whether you’re hosting a gathering or enjoying a quiet night in, these serving suggestions will elevate your cheesecake experience.
Individual Slices
- Serve each slice on its own plate for a classic presentation. You can garnish with whipped cream and additional chopped Butterfingers for an extra touch.
With Fresh Berries
- Pair the cheesecake with a side of fresh berries like strawberries or raspberries. The tartness of the berries balances the rich flavors of the cheesecake beautifully.
Drizzled with Chocolate Sauce
- Add a drizzle of chocolate sauce over each slice for an indulgent treat. This enhances the chocolate flavor and makes it visually appealing.
Accompanied by Coffee or Tea
- Serve slices alongside your favorite coffee or tea. The warm beverage complements the rich textures of the cheesecake, creating a comforting pairing.
At Celebratory Gatherings
- Present the Butterfinger Cheesecake as a centerpiece at birthdays or special occasions. It’s sure to impress guests and become a talking point at any event.
How to Perfect Butterfinger Cheesecake
To ensure your Butterfinger Cheesecake turns out perfectly every time, follow these helpful tips.
-
Use Room Temperature Ingredients: Allow cream cheese, eggs, and sour cream to come to room temperature for smoother mixing and better texture.
-
Avoid Overmixing: Mix ingredients just until combined to prevent air bubbles, which can cause cracks during baking.
-
Bake in a Water Bath: Place your cheesecake pan inside another larger pan filled with water while baking. This helps maintain even temperature and moisture.
-
Chill Thoroughly: Let the cheesecake cool completely at room temperature before refrigerating. Chilling overnight enhances flavor and texture.
-
Don’t Rush Serving: Allow the cheesecake to set for several hours before slicing. This ensures cleaner cuts and better structure.
Best Side Dishes for Butterfinger Cheesecake
When serving Butterfinger Cheesecake, consider pairing it with complementary side dishes that enhance its flavors.
-
Vanilla Ice Cream: A scoop of creamy vanilla ice cream adds a cool contrast to the rich cheesecake.
-
Chocolate Mousse: Light and airy chocolate mousse pairs well, offering a different texture while maintaining chocolatey goodness.
-
Fruit Salad: A refreshing fruit salad brings brightness to your plate, balancing the richness of the cheesecake.
-
Caramel Sauce: Drizzling warm caramel sauce over the cheesecake adds sweetness and depth that enhances every bite.
-
Whipped Cream: Classic whipped cream topping is always welcome, providing lightness against the dense cheesecake.
-
Coconut Macaroons: These chewy treats offer a delightful contrast in texture while adding tropical flair to your dessert spread.
Common Mistakes to Avoid
When making Butterfinger Cheesecake, it’s easy to stumble into common pitfalls. Here are some mistakes to watch out for:
-
Boldly skip room temperature ingredients: Using cold cream cheese or eggs can lead to a lumpy cheesecake. Always let them sit at room temperature for about 30 minutes before starting.
-
Boldly underestimate chilling time: Cheesecake needs proper chilling to set correctly. Avoid cutting corners; chill your cheesecake for at least 4 hours, or overnight for best results.
-
Boldly mix too vigorously: Overmixing can incorporate too much air, leading to cracks in your cheesecake. Mix just until combined for a smooth texture.
-
Boldly ignore the crust preparation: A soggy crust is often the result of not properly pressing the Oreo crumbs or using melted butter. Ensure you press it firmly and evenly into the pan.
-
Boldly overlook ingredient measurements: Incorrect measurements can ruin your recipe. Use a kitchen scale for accuracy, especially with ingredients like cream cheese and sugar.
Storage & Reheating Instructions
Refrigerator Storage
- Store leftover Butterfinger Cheesecake in an airtight container.
- It will keep well in the refrigerator for up to 5 days.
Freezing Butterfinger Cheesecake
- If you want to freeze it, wrap individual slices in plastic wrap and then place them in a freezer-safe container.
- It can be frozen for up to 2 months; just make sure to label it with the date.
Reheating Butterfinger Cheesecake
- Boldly avoid rapid reheating: It’s best served chilled. If you want it slightly warmer, let it sit at room temperature for about 30 minutes before serving.
- Boldly use gentle heat: If you must reheat, use an oven set at low temperature (around 200°F) for about 10-15 minutes.
- Boldly skip direct microwave heating: Microwaving may cause uneven warming and affect texture. If necessary, warm on low power in short bursts.
Frequently Asked Questions
Some common questions arise when preparing Butterfinger Cheesecake. Here are answers to help guide you.
What is Butterfinger Cheesecake?
Butterfinger Cheesecake is a rich dessert that combines creamy peanut butter cheesecake with crushed Butterfinger candy bars, all nestled in a chocolate Oreo crust.
Can I use other types of candy in my Butterfinger Cheesecake?
Absolutely! You can substitute other candies like Snickers or Twix for a different flavor profile while maintaining the same delicious cheesecake base.
How long does Butterfinger Cheesecake last?
When stored properly in the fridge, Butterfinger Cheesecake lasts up to 5 days. If frozen, it can remain good for up to 2 months.
Can I make this recipe ahead of time?
Yes! In fact, making it ahead of time allows flavors to meld beautifully. Prepare it up to two days before serving and store it in the refrigerator.
Final Thoughts
This Butterfinger Cheesecake is not only decadent but also incredibly versatile. You can customize it by adding your favorite toppings or using different candy bars. Whether you’re serving guests or treating yourself, this recipe is sure to impress with its rich flavors and creamy texture!
Butterfinger Cheesecake
Indulge in the rich and creamy delight of Butterfinger Cheesecake, a dessert that combines the smoothness of peanut butter with the crunch of Butterfinger candy bars, all resting on a decadent chocolate Oreo crust. This cheesecake is perfect for any occasion, from celebrations to casual nights at home. The flavor profile strikes a perfect balance between sweet and salty, making it an irresistible treat for everyone. With easy-to-follow instructions and readily available ingredients, you can whip up this stunning dessert in no time. Impress your guests or simply indulge yourself with every luscious bite!
- Prep Time: 20 minutes
- Cook Time: 60 minutes
- Total Time: 1 hour 20 minutes
- Yield: Serves approximately 12 slices 1x
- Category: Dessert
- Method: Baking
- Cuisine: American
Ingredients
- 2 1/4 cups Oreo crumbs
- 4 tbsp salted butter, melted
- 24 ounces cream cheese
- 1 cup sugar
- 3 tbsp all-purpose flour
- 3/4 cup sour cream
- 1/2 cup peanut butter
- 4 large eggs
- 1 1/2 cups chopped Butterfingers
- For topping: chocolate chips, heavy whipping cream, powdered sugar
Instructions
- Preheat oven to 350°F (175°C). Combine Oreo crumbs and melted butter; press into a springform pan and bake for 10 minutes. Let cool.
- Beat cream cheese, sugar, and flour until smooth. Mix in sour cream, peanut butter, and vanilla extract. Add eggs one at a time, then fold in chopped Butterfingers.
- Pour filling over crust; bake for 50-60 minutes until set but slightly jiggly in the center. Cool in oven for an hour.
- For topping, melt chocolate chips with heavy cream until smooth; cool slightly. Whip remaining heavy cream with powdered sugar and peanut butter until soft peaks form.
- Once cooled, pour chocolate ganache over cheesecake; top with whipped cream mixture and sprinkle additional Butterfingers.
Nutrition
- Serving Size: 1 slice (100g)
- Calories: 400
- Sugar: 30g
- Sodium: 300mg
- Fat: 30g
- Saturated Fat: 15g
- Unsaturated Fat: 10g
- Trans Fat: 0g
- Carbohydrates: 35g
- Fiber: 2g
- Protein: 6g
- Cholesterol: 90mg